One of the biggest advantages of VMS Guru is that you don't need expensive CCTV cameras or professional recording equipment to start recording packaging videos. Using the Camo app, your phone becomes a standard webcam on your Windows PC — and VMS Guru detects it automatically, exactly like any other camera.
The whole thing runs over Wi-Fi — you pair the phone to the PC once by scanning a QR code, and there is no cable trailing across your packing table. This guide takes about five minutes end to end. By the last step you'll have an overhead camera recording every dispatch and attaching it to the order.
What you need
Step 1Download Camo on your phone
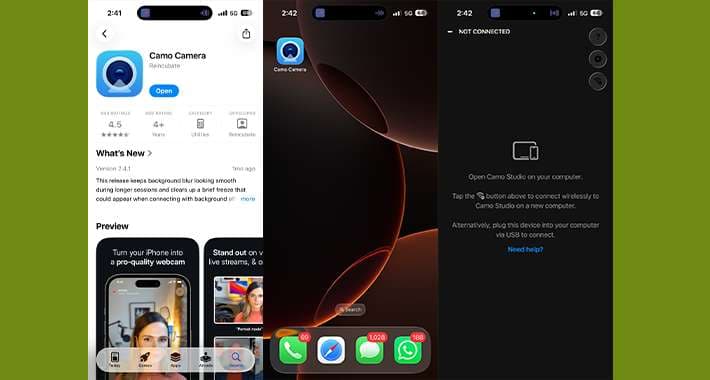
Search for Camo Camera on the App Store (iPhone) or the Google Play Store (Android) and install it — or grab the links from camo.com. Open the app once it's installed. It will show Not connected and ask you to open Camo Studio on your computer, which is exactly what we do next.
Step 2Install Camo Studio on your PC
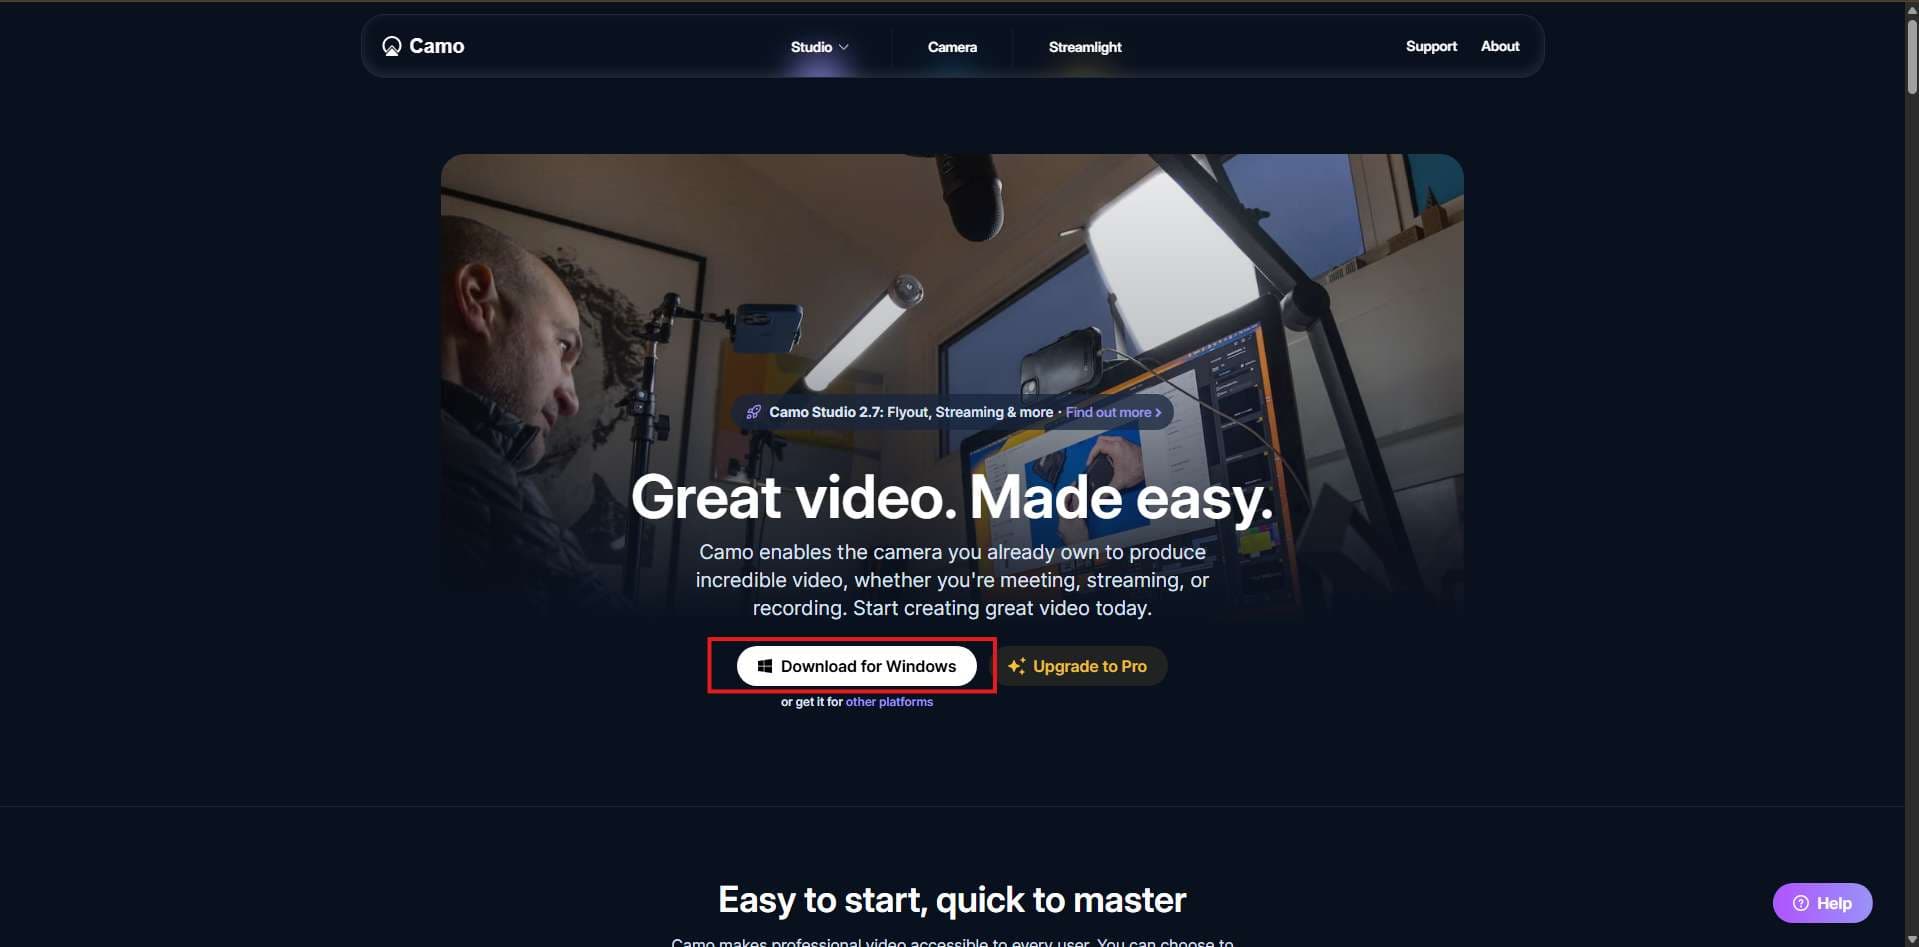
Go to camo.com/studio and click Download for Windows, then run the installer. Camo Studio is the piece that exposes your phone to Windows as a regular webcam — it needs to be running whenever you record.
Step 3Pair the phone over Wi-Fi by scanning a QR code
No cable required. Camo pairs the two devices wirelessly — you scan a QR code shown on the PC using the phone app, and they stay linked from then on. Before you start, make sure the phone and the PC are connected to the same Wi-Fi network.
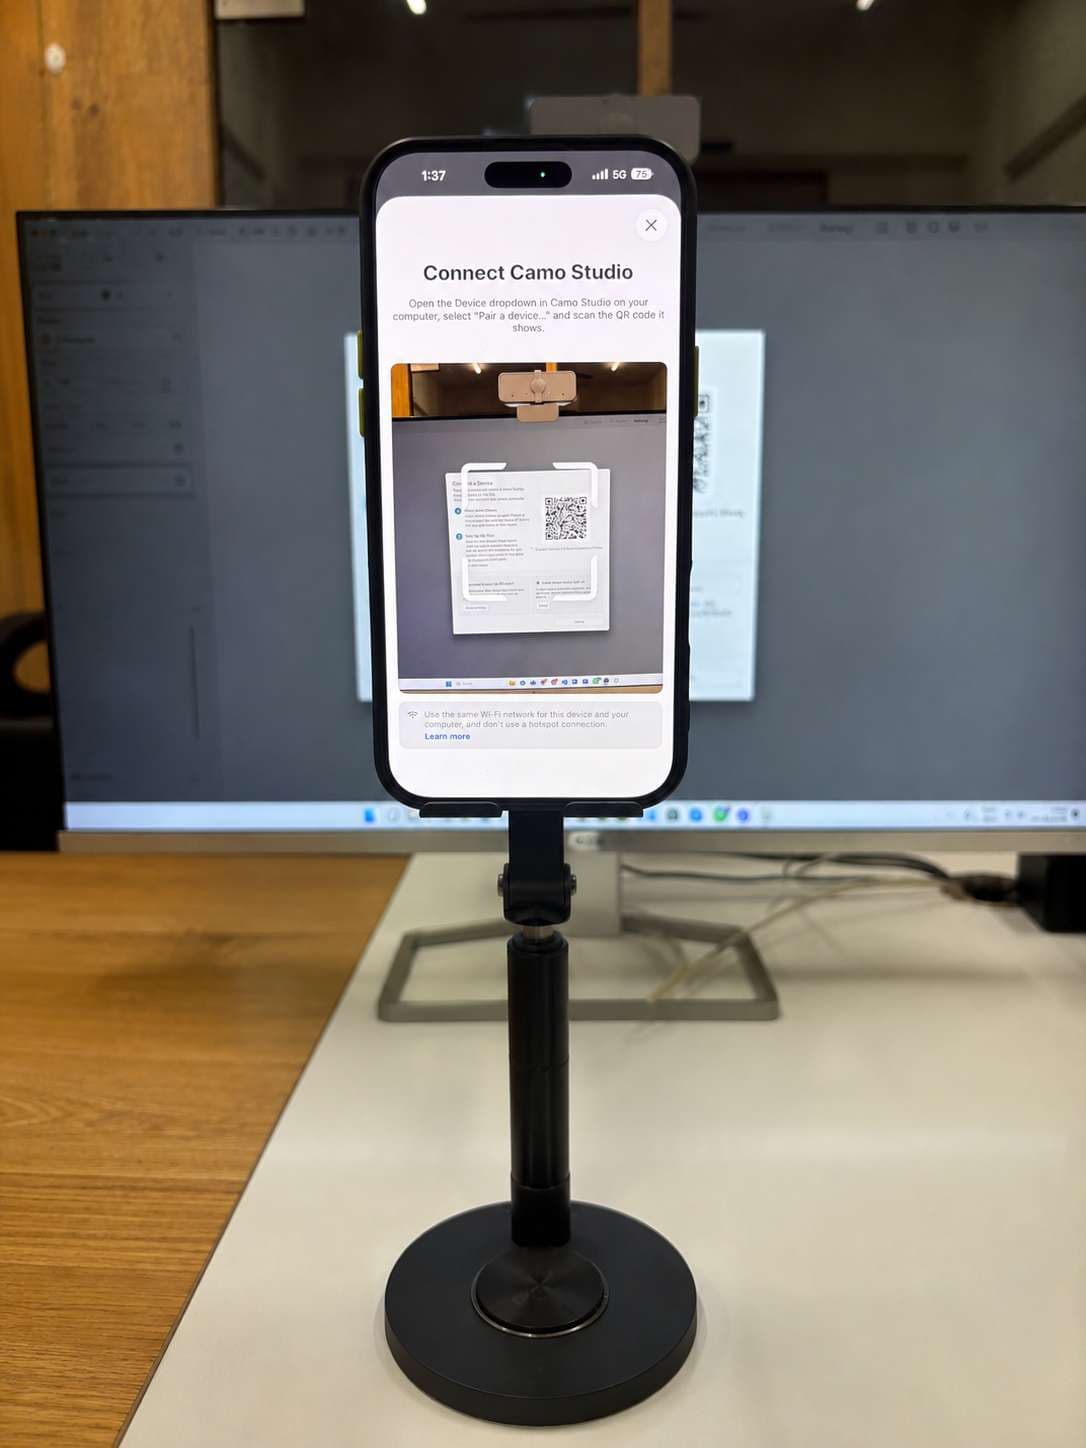
- In Camo Studio on the PC, open the Device dropdown and select Pair a device…. A QR code appears on screen.
- On the phone, tap the Wi-Fi icon in the Camo app — this opens the QR scanner.
- Point the phone at the QR code on the monitor. Pairing takes a second or two.
- The phone now appears in the device list inside Camo Studio. Select it to start streaming.
Use your normal Wi-Fi network for both devices — not a phone hotspot, and not a guest network. If Windows shows a firewall prompt the first time you pair, allow Camo Studio on private networks, or the two devices won't see each other.
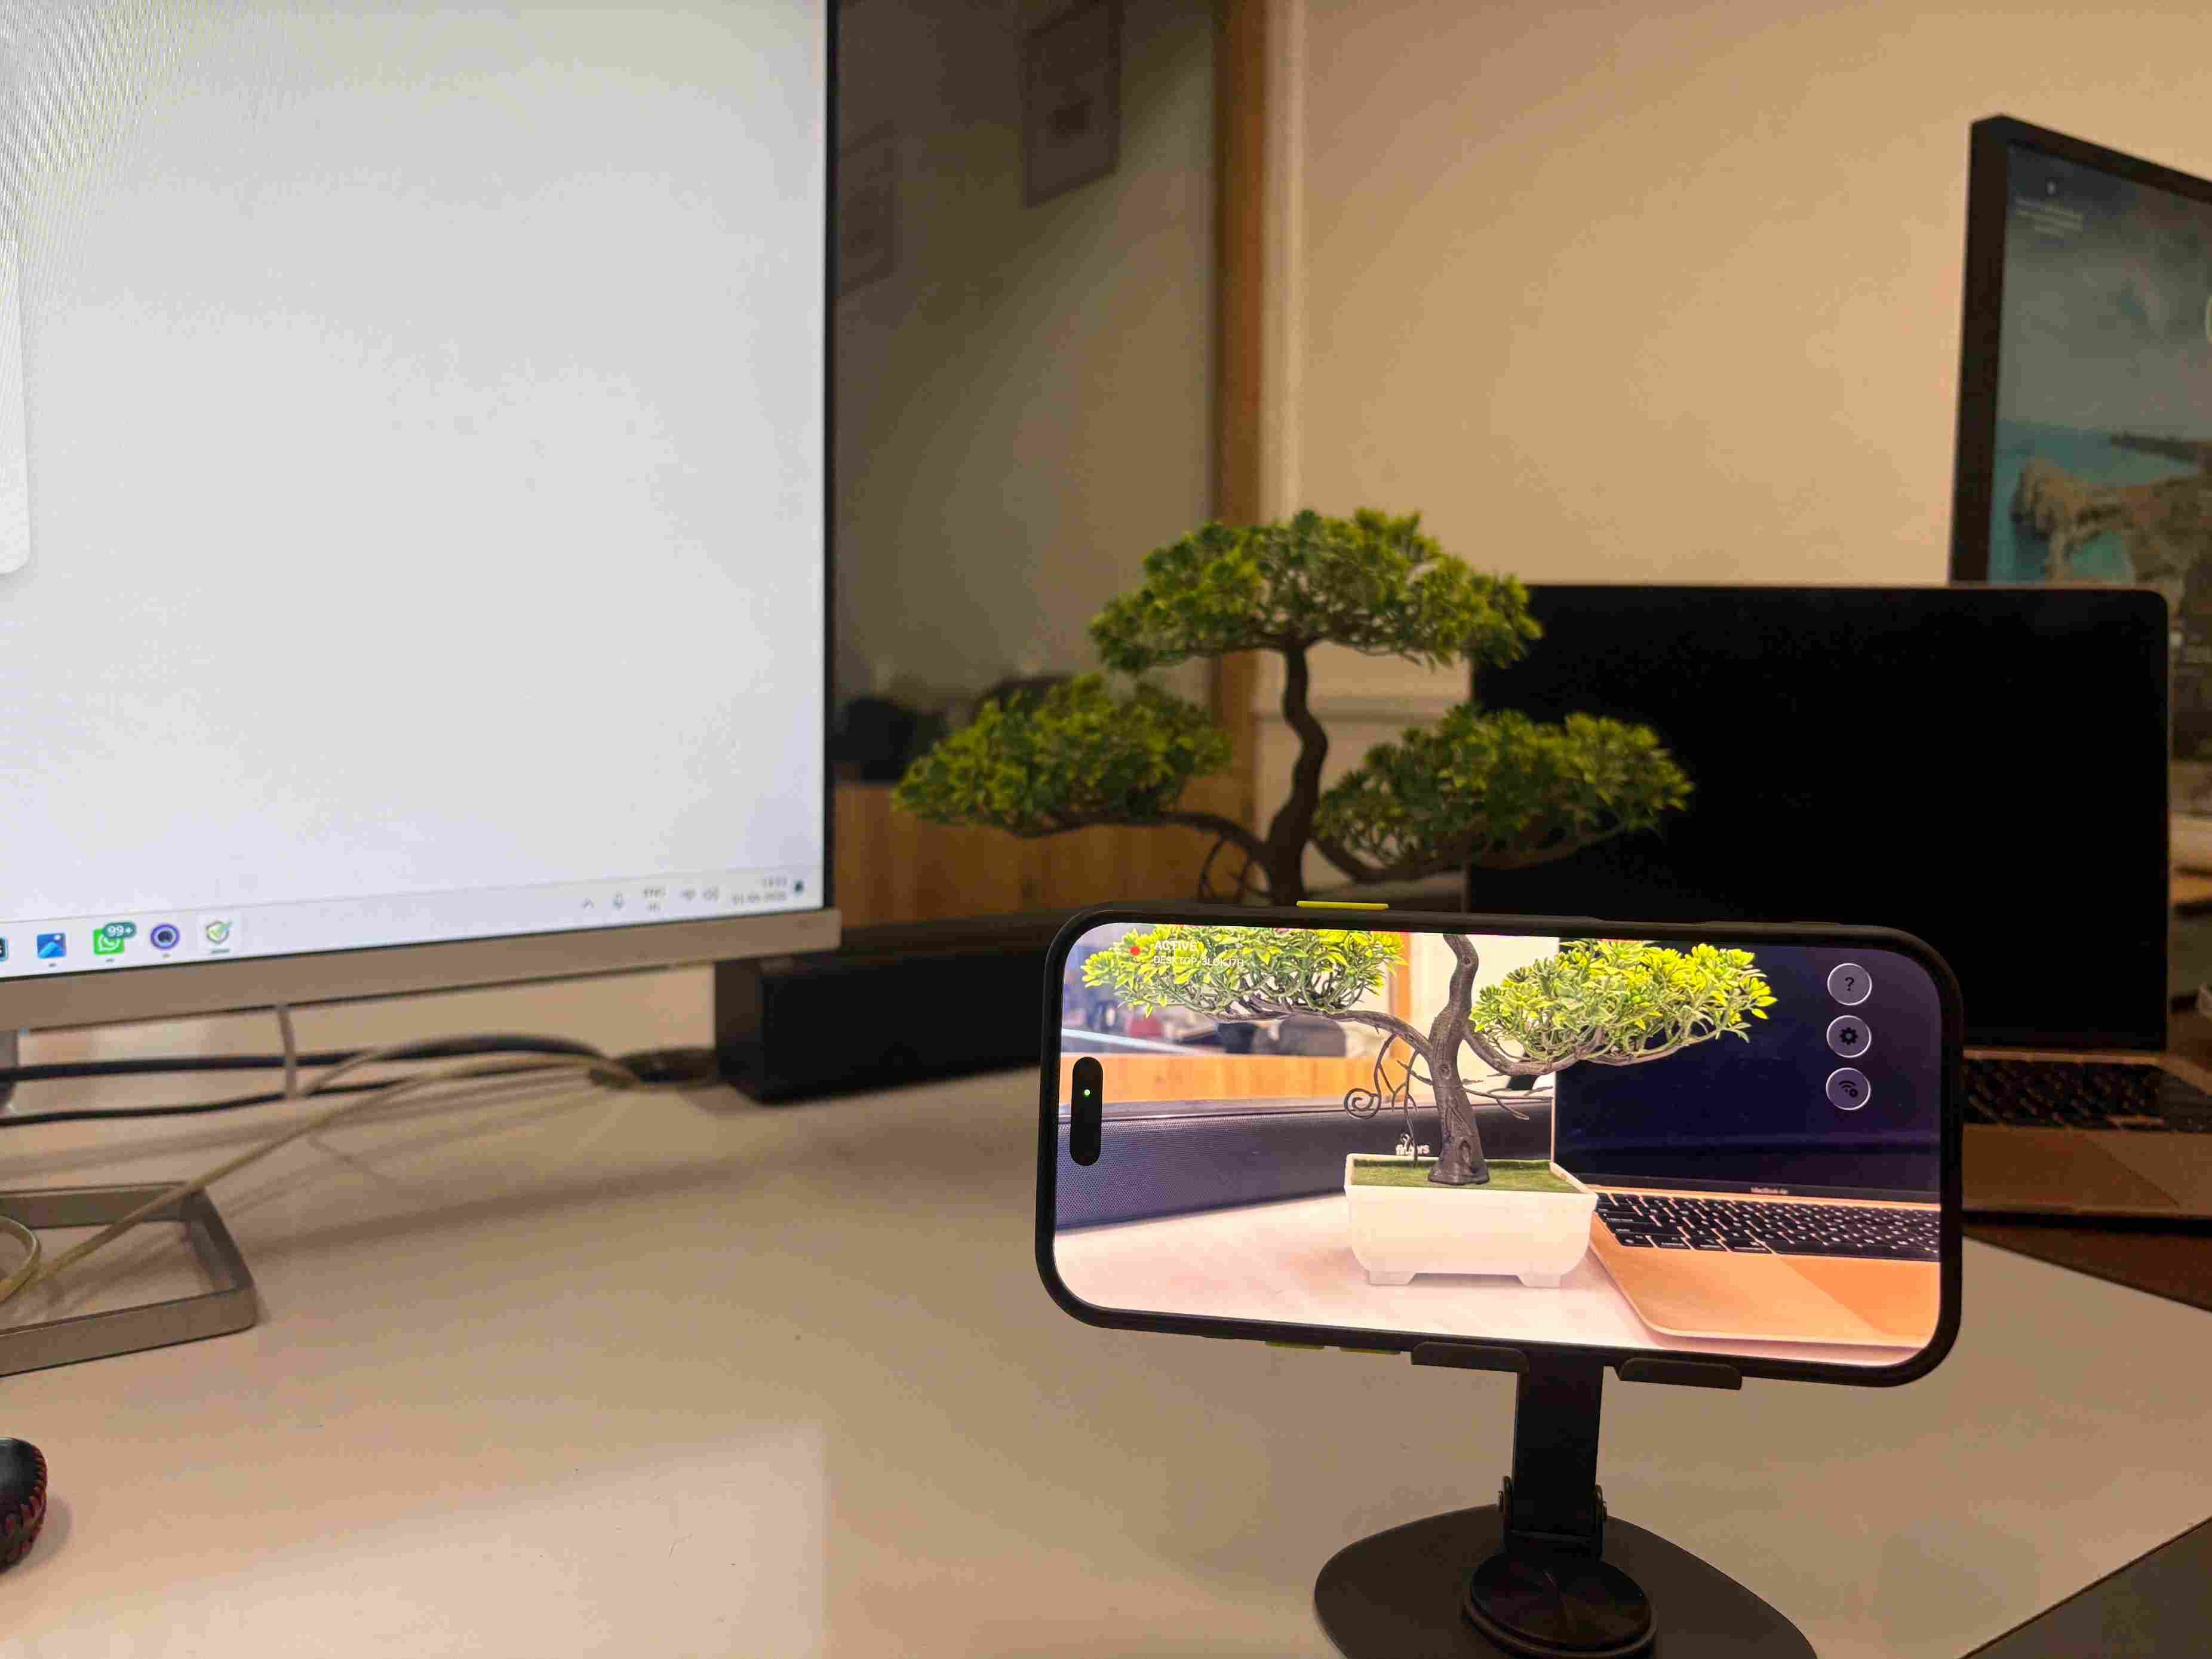
Once paired, the phone starts streaming and Camo Studio shows a live preview from its camera.
Pair once, reconnect automatically
You only scan the QR code the first time. After that, opening the Camo app while both devices are on the same network is enough — the phone reappears in Camo Studio's device list on its own.
Step 4Mount the phone above your packing table
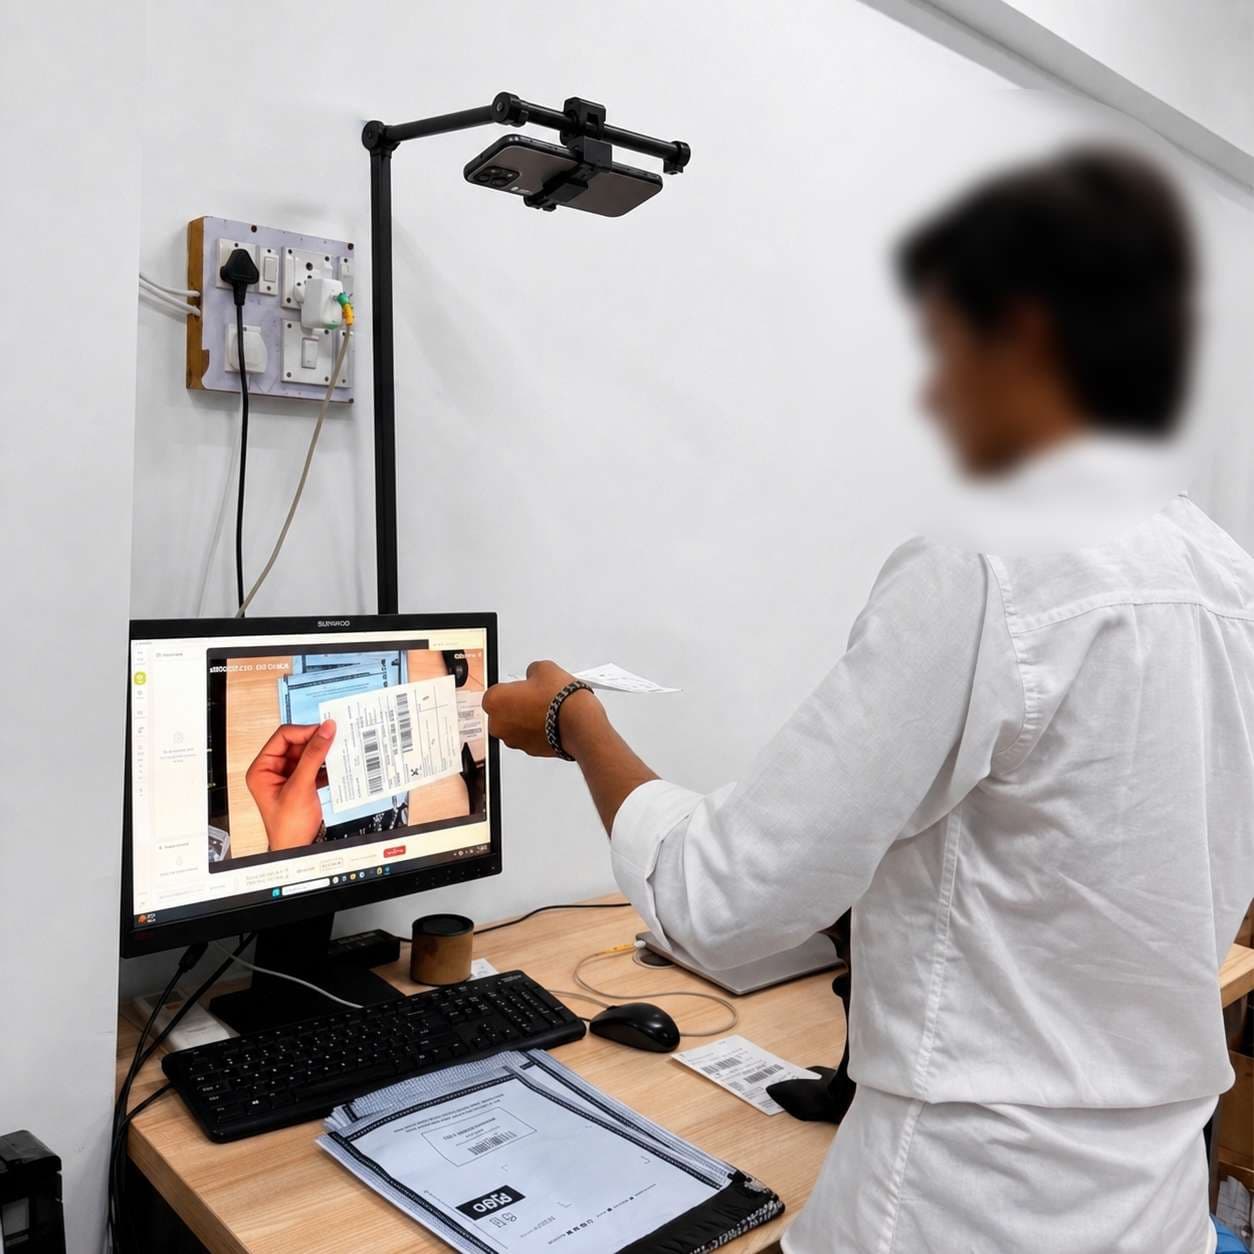
Camera position matters more than camera price. Put the phone on a stand facing straight down at the packing area so the product, the box and the shipping label are all in frame.
| Setting | Recommended |
|---|---|
| Height | 45–60 cm above the table |
| Angle | 90° downward (top view) |
| Lighting | Bright white light on the table surface |
Step 5Open VMS Guru and select the camera
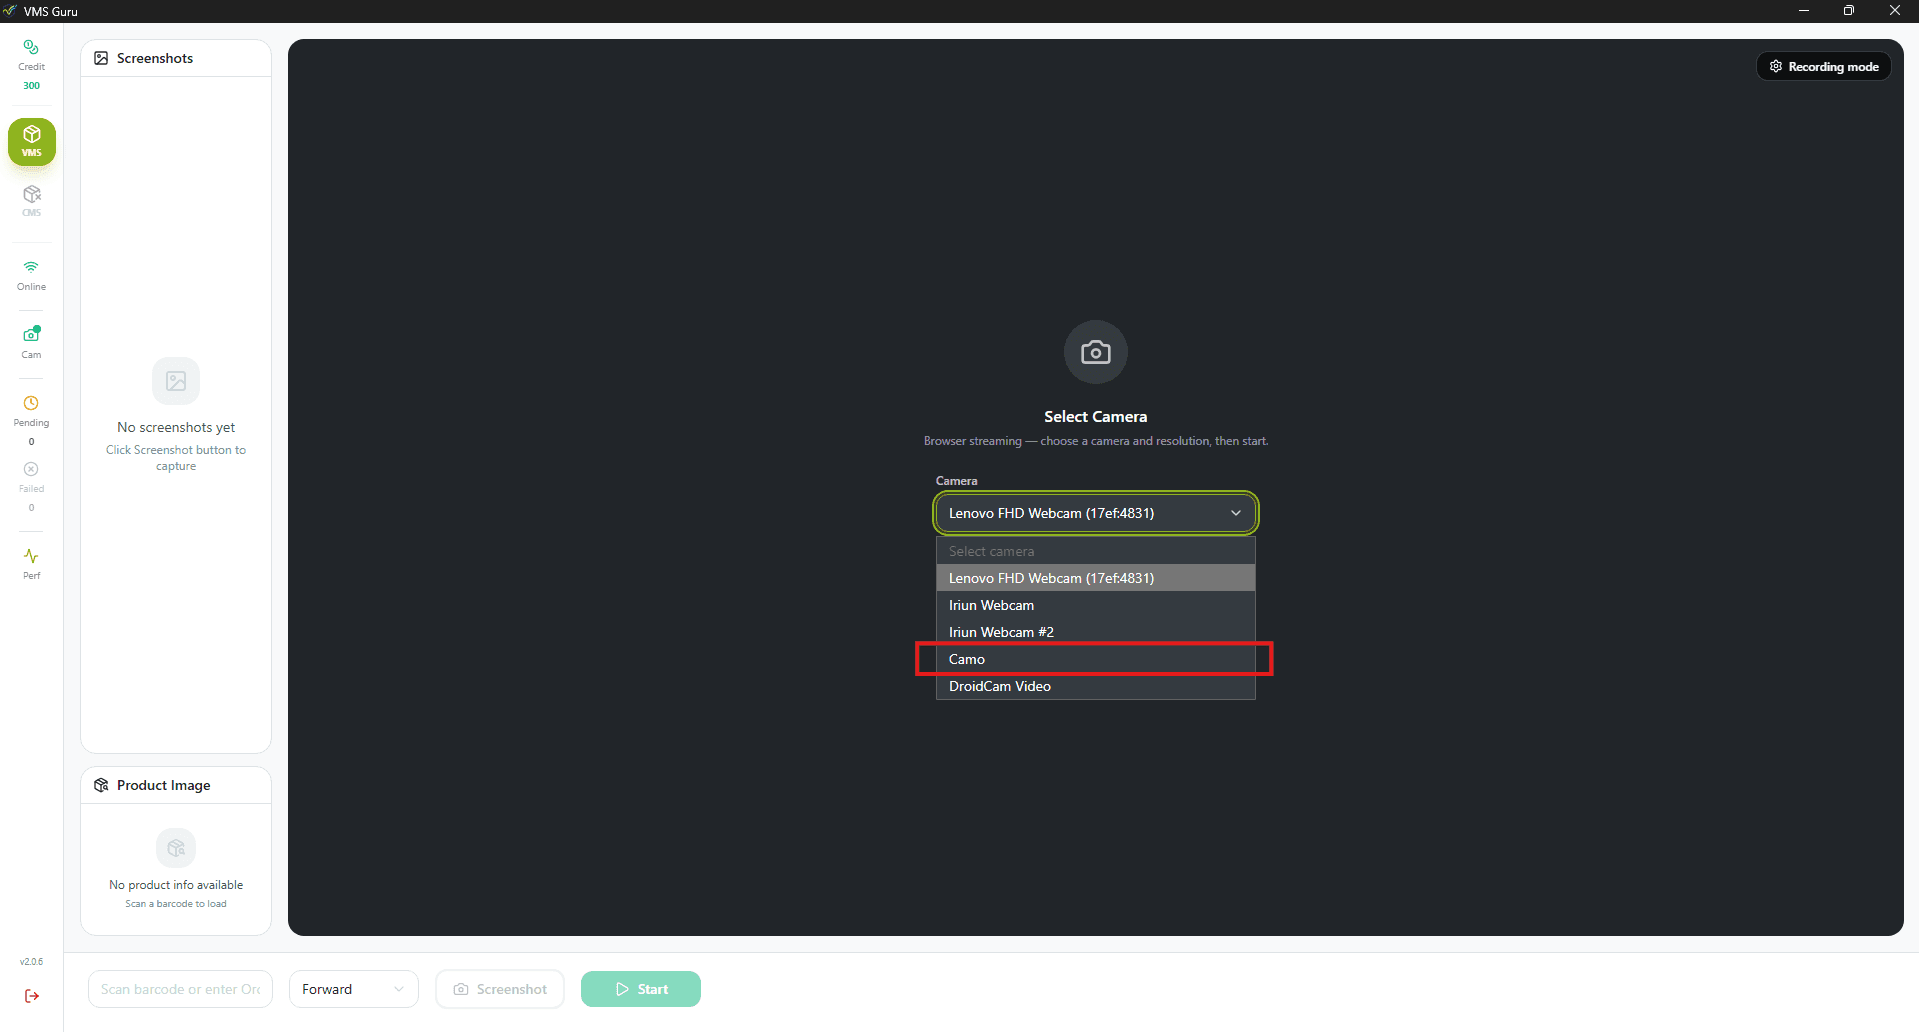
Launch VMS Guru on the same computer. On the Select Camera screen, open the Camera dropdown — Camo is listed there alongside your built-in webcam and any other camera app on the machine. Pick it and check the preview.
Step 6Start recording
Scan the barcode or type the order ID, then click Start. VMS Guru now records straight from your phone camera. From here you can:
- Record packaging videos automatically for every order
- Attach each video to its order ID
- Send the video to the customer on WhatsApp or email
- Keep the footage as proof for disputes and claims
A real, zero-cost setup
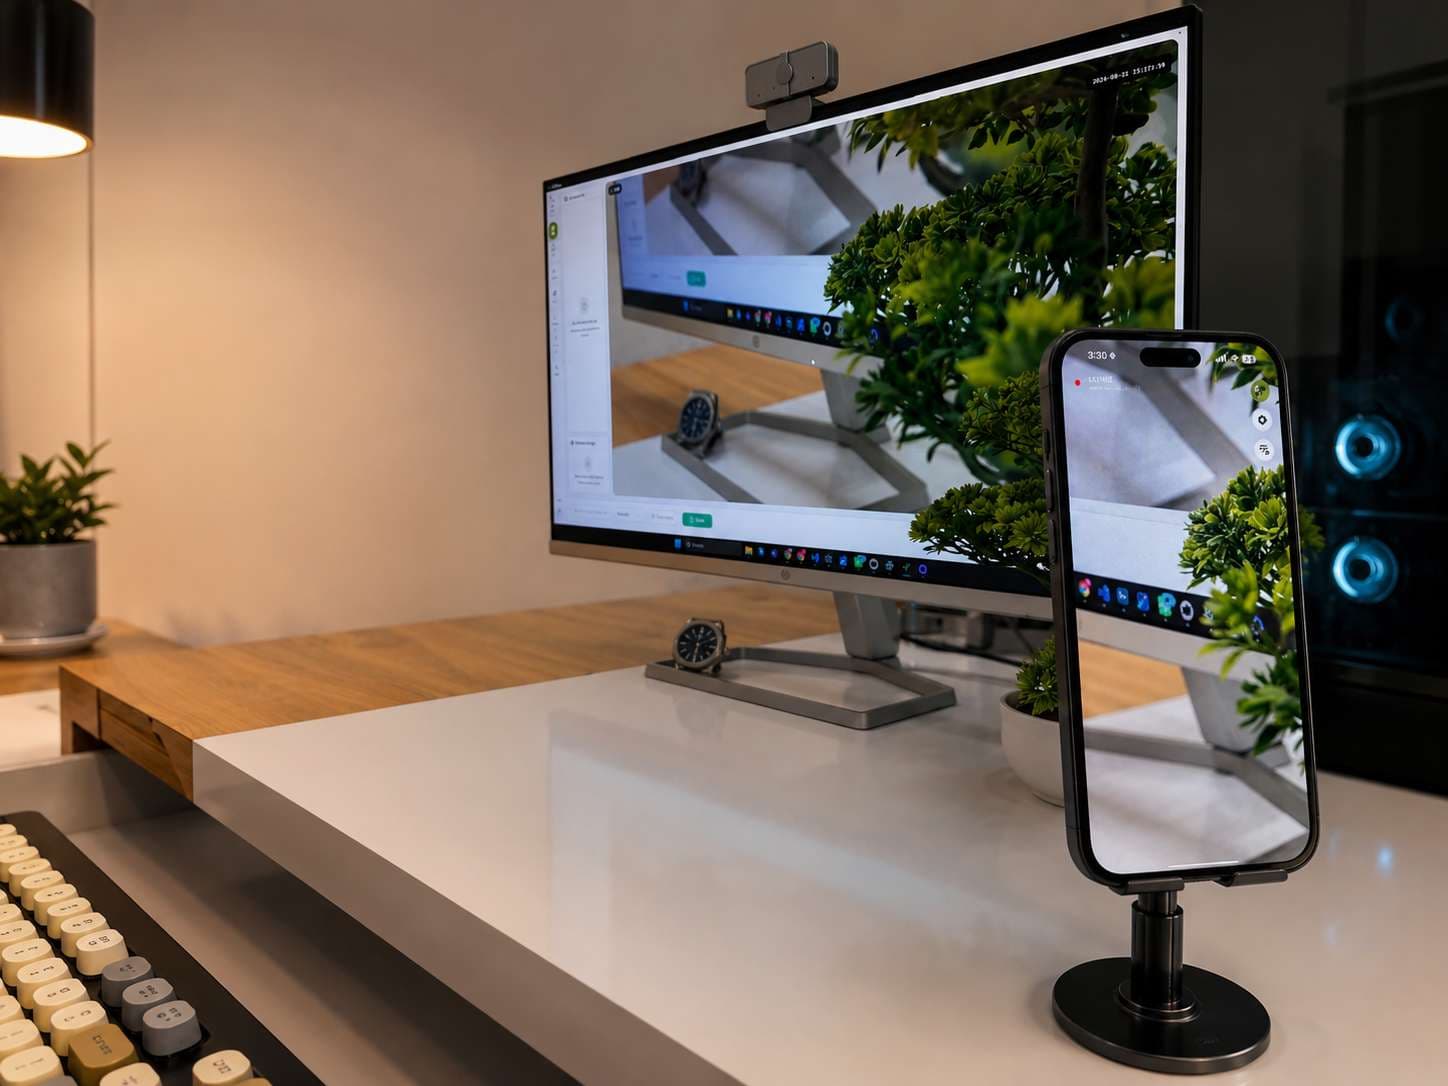
Plenty of sellers start with a spare phone and upgrade to dedicated cameras only once volume justifies it. A complete working station looks like this:
- An old Android phone
- A ₹300–500 phone stand
- The Wi-Fi you already run in the shop
- The VMS Guru desktop app
No CCTV camera, no DVR, no cabling contractor — and no cable running across the packing table either.
Video quality tips
| Setting | Recommended |
|---|---|
| Resolution | 1080p |
| Frame rate | 30 FPS |
| Focus | Continuous AF |
| Brightness | 60–70% |
| Connection | Wi-Fi — same network on both devices |
| Band | 5 GHz where available |
Wireless streaming is only as steady as the network under it. Put the packing station on the 5 GHz band if your router offers one, keep the phone within clear range of the access point, and keep it on a charger — a phone streaming video all day will not survive a shift on battery alone.
Troubleshooting
The QR code will not scan / the phone does not pair
- Check that both devices are on the same Wi-Fi network — not one on Wi-Fi and one on mobile data, and not a separate guest network.
- Guest and public networks often block devices from seeing each other. Use your main network.
- Allow Camo Studio through the Windows firewall on private networks.
- Increase screen brightness on the PC, and hold the phone 15–20 cm from the QR code.
Camo is not appearing in VMS Guru
- Close and reopen VMS Guru after the phone has paired.
- Make sure Camo Studio is running in the background and the phone is selected in its device list.
- Reopen the Camo app on the phone so it rejoins the network session.
The video is blurry
- Clean the phone camera lens.
- Increase the lighting on the table.
- Tap the screen once to refocus.
The stream stutters or drops out
- Switch the phone to the 5 GHz band if your router has one.
- Move the phone or the access point so there is a clear line between them — metal racking kills Wi-Fi.
- Disable battery optimisation for Camo so Android does not throttle it in the background.
- Keep the phone on a charger during recording.
Why we support Camo natively
Most warehouse recording systems ask you to buy your way in before you can test anything:
- CCTV cameras
- DVR/NVR hardware
- Long cable runs and an installer
- Configuration you'll need someone else to do
With VMS Guru and Camo, you start recording on a device that is already in your pocket. Setup usually takes under five minutes, and nothing stops you from moving to dedicated cameras later — VMS Guru treats them the same way.
The end result
Once configured, the workflow runs itself:
- An order comes in.
- The phone camera records the packing.
- VMS Guru saves the video automatically.
- The video is attached to the order.
- The customer receives the recording on WhatsApp or email.
No manual recording, no file transfers between devices, and no expensive camera hardware.
Ready to try it?
Get VMS Guru and start recording packaging videos with your phone camera today. No credit card required — setup takes less than five minutes.